The hosts file is basically a plain text file that is used to map host names to IP addresses. It is located deep down in the Windows folder: C:\Windows\System32\Drivers\etc. In this tutorial we’ll show you how to modify / edit the hosts file in Windows 10 or 8, and use it to block opening of one or more particular websites.
Part 1: Edit Hosts File
You can use any text editor to open the hosts file. But you’ll get the “Access is denied” error when you try to save your changes back to the hosts file. By default, the hosts file is protected from user changes. Before editing, you need to take ownership of the hosts file so you have full permissions to it. Here’s how:
- Download and install the freeware TakeOwnershipPro on your local computer. After installing, it will add a TakeOwnershipPro shortcut to the right-click context menu.
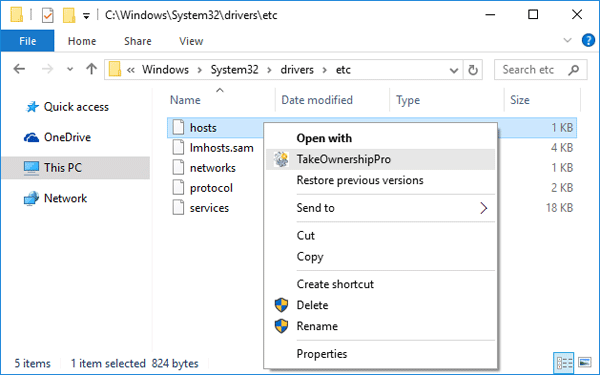
- Browse to the folder C:\Windows\System32\Drivers\etc. Right-click on the hosts file and select “TakeOwnershipPro” from context menu.
![take-ownership]()
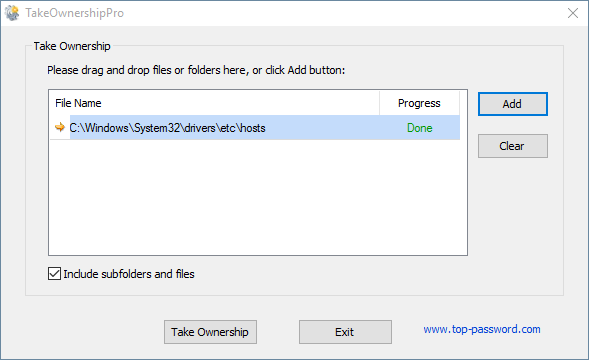
- When the popup window says the process of taking ownership is done. Click Exit to close it.
![TakeOwnershipPro]()
- Now the hosts file is ready to be modified.
Part 2: Block A Particular Website
The hosts file could be used to block access to any websites that you don’t want to visit. For example, lets say you want to prevent your computer from accessing the youtube.com website, simply add the following line to the end of the hosts file:
127.0.0.1 youtube.com

Once you’ve made the necessary changes, save it back to the hosts file and restart your computer for the changes to take effect.
Part 3: Prevent hijacking
Beware, the hosts file can also be used by viruses or malware to redirect you to phishing and other dangerous sites. To help prevent hijacking or unauthorized changes to the hosts file, consider making it read-only. Simply navigate to the hosts file with Windows Explorer: C:\Windows\System32\drivers\etc. Then right-click the hosts file, select Properties, check the Read-only attribute, and click OK.

